– Original date: 2015-05-29
– Labels: DIY
### Content (HTML)
“`html

This is a DIY on how to make your own Blog Post Planner (because supposedly you need one) for under $15. Like the blog title says, duh.
If you’re crafty, then you’ve got some supplies and that will help. If you’re not crafty and you don’t have supplies you may need to shell out more than the $15 I quote BUT hopefully it won’t be much more. Plus I’ll give tips where I can so you can cut some corner’s. Afterall, who has a bajillion dollars to spend on their blog? Yeah, me neither.
The only things I purchased for this were:
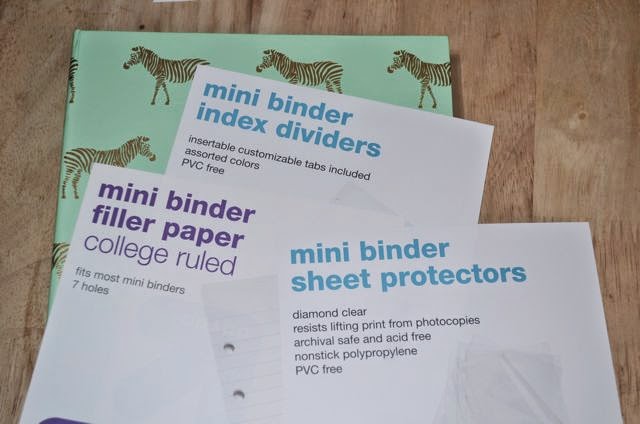
- Binder
- I Purchased this small one @ Target for $3.99
- Kind of the main thing. You could use a notebook & I was, but it was lacking organization & I *really* need that. Could purchase a planner but that’s no fun!
- Insert Pages
- I got these ones @ Target for $1.86
- WAY TO SAVE: Make your own with notebook paper you already have, scissors/paper trimmer & a hole punch. You can use unlined or lined paper
- Dividers
- $2.99 @ Target
- WAY TO SAVE: You can make on your own with construction paper for colored dividers or print out a design on a half sheet of regular blank paper OR draw/decorate it however, scissors/paper trimmer, tape/glue (to make the tab you’d just need to cut out a certain size & tape or glue it onto the edge of the paper. Card stock works best if you’ve got it. Not as flimsy.)
- Pocket Protectors
- $2.99 @ Target
- Non-essential but the devil in me said, “you may want these, get them.”
The only thing I *needed* to buy was the binder. But you could do this under $10 if you skip the pocket protectors. Everything else can be made with some elbow grease and your neighborhood friendly Google Search!
Once it was all put together, the only thing lacking in my little planner was a calendar. As I said, I already had a notebook so I guess I could have copy & pasted a calendar in there but I’d still have the problem of moving things around if I needed to. So much paper waste, ugh!
I got a little crafty, did some Pinterest and deep Google Searching and found there are two ways to do this:
- Print a blank monthly calendar, cut it in half, hole-punch and insert facing up.
- You can do them back to back & have a whole calendar year together OR leave the back blank for writing notes
- Print a weekly calendar with tasks on it that takes up half the page, make sure it is on the same sheet twice, print, cut in half and insert between notes.
Example 1:
 |
| Save and Print (make sure you rotate it to landscape! It won’t be the right size if you don’t). Write in the Month & Dates, Cut in half & hole-punch (or insert into pocket protector) |
Example 2:
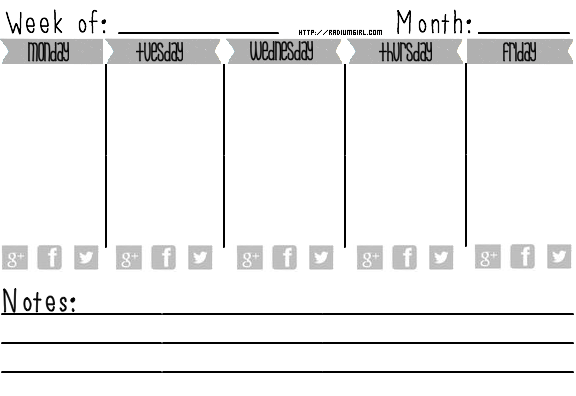 |
| You can save this, put it in Word (Twice) & Print or Download the PDF file & Print Write the blog post under the day of the week (I gave you weekends off, slacker) Circle the social media icon when you’ve promoted the post on that platform so you know what you’ve promoted and what you haven’t throughout the week. The note section is in case you’d like to you know, make a note of something. Do I have to do everything for you? |
Here is what mine looks like with all the stuff in it:
 |
| Using a pocket protector to hold some stickers for later |
 |
| Use of Dividers & Tabs |
 |
| So I’ve got some post ideas… this is one of the notebook pages, torn out & placed in a pocket protector. No wasted paper! |
 |
| Making use of Ex 1 Monthly Calendar. This is what it looks like (or should look like) when it’s in your binder. |
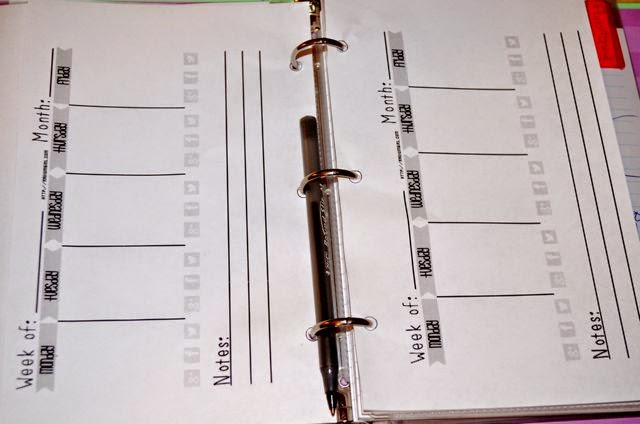 |
| This is how the weekly planner should look. If you can’t tell, I couldn’t find my hole punch. Instead I traced the holes in a divider & forced the pen through the middle (slowly & gently) until it was big enough for the binder rings to go through. I make it work ok? |
If you need some help with these leave it in the comments or shoot me an e-mail. If you want some more decorative and colorful designs there are a ton of these things listed on Etsy. You can download whatever designs they have but they will cost you. Mine are free so you take what you can get dude.
“`
—